
To accomplish the look I wanted, I used a process called over-dying. The definition, in the captain obvious fashion, is to dye over top of an already existing pattern. In this case, I was dying over a black on white arabesque print. The fabric I used was also 100% cotton meaning it takes dye fairly predictably. Awesome. So let's talk about what I actually did.

Materials Used
-1/2 yard exterior fabric (printed cotton duck)
-1/2 yard interior fabric (magenta broadcloth)
-1/4 yard yoke fabric (black canvas)
-2-1/2ish yards fusible interfacing (I keep a crap ton of this around the house at all times)
-1/2 yards fusible fleece
-2 yards black cotton strapping (adjust for your desired strap length)
-Approximately 2-1/2 yard piping (I used about 1 yard of the black and 1-1/2 yards of the pink)
-Approximately 2-1/2 yard piping (I used about 1 yard of the black and 1-1/2 yards of the pink)
-1/2 bottle RIT dye in fuchsia
-salt
-plastic container you don't mind losing
-rubber gloves
-dowels or something similar (like a yard stick)
Step One- get the shrinkage out of the way
Prewash, dry, and press all your fabrics. Just do it. I've never regretted doing it but I definitely HAVE regretted not prewashing (like the time I turned a cape for a friend pink. True story).
Step Two- Making sure our nerves (and bag) don't get too frayed
Cut out the pieces of your pattern per the directions. Here is where you will want to deviate a little though. The outer fabric, which you will be over-dying, is going to be washed again. Cotton duck LOVES to fray so you will want to make sure that after the process is over, you still have fabric to work with. I traced my pattern with my dressmaker's marker, then traced a half-inch perimeter around that to leave room for fray. I then cut out my outer line, and then stitched along the inner line. This line of stitching will help prevent fray.
 |
| Lay your pattern over top of your folded fabric and trace using a dressmaker's marker (the kind that will go away in the wash). Ignore the shoe sticking out from under my bed. |
 |
| Trace a 1/2" perimeter around the outside and then cut on your outside line. |
 |
| Once you are all cut out, you will want your interior line to continue all the way around so to easily do that, flip the pattern, match it up with what you already drew, and then trace the other side. Baste stitch over that line. |
Step Three- Curl up and (dip) dye
There are dozens of detailed tutorials out there on ombre dying techniques. I'll give you the low down but if you have problems, consider looking up a tutorial online with better instructions.
1. Pour 1 cup of salt into your dyeing bin. Add in three gallons of hot water (at least 165 degrees), and then pour in half a bottle of RIT dye. Stir it up.
2. Use a dowel to suspend the fabric into the dye. Allow the bottom third of the fabric to go into the dye and set a timer for fifteen minutes. Swish the fabric around every few minutes.
3. When the timer goes off, allow the second third of the fabric to go into the dye. Set a time for ten minutes and swish the fabric around a few times to prevent really harsh lines.
4. When your second time goes off, dip the next few inches of fabric in and out a few times to get a darker shade and blend the edge. Then dip the whole piece in once and immediately pull it out.
5. Rinse your fabric pieces, holding the lightest shade at the top at all times. The allows the excess dye to flow through the fabric from lightest to darkest.
6. Rinse thoroughly in cold water. When rinse water runs clear, hang to dry for a few minutes before machine washing in cold water with light detergent. Dry and press. Feel free to work on the interior of the bag while the exterior is drying. Move on to step 5 if desired.
 |
| I used painters tape to attach my fabric to a yard stick. I want to start with about 2 inches of fabric in the dye so I taped accordingly. In order to try to keep the two sides even, I put both on the same stick on opposite sides. |
 |
| I was dying two, as you see here. My fabric was a little wider than my tub so I started by doing the center... |
 |
| ...and then shifted the yard sticks to do the sides after about five minutes. After another five minutes, I shifted it again to get the other edge. |
Step Four- Give that bag a trim
Lay your pattern (or the already cut bag interior) back over your freshly dyed pieces. Trim away the excess. |
| See all that excess? Yeah, you want that gone. I used my quilters Ruler and rotary cutter to trim away the straight parts.... |
 |
| ...and then used my scissors to clip away those sexy curves. |
Step Five- Fusion
Fuse your interfacing to all of the pieces. Here is where I deviated a little from the instructions: I added interfacing to the bag lining. Why? 1) The original pattern/tutorial uses all home decor weight fabrics. I didn't. 2) I prefer a sturdier lining in my bag to support all the crap I carry around. If you are using quilting weight cotton, I recommend using the interfacing.
Note: The yoke and exterior bag pieces will get both interfacing and fusible fleece. Do the interfacing first, and then the fleece.
Note: The yoke and exterior bag pieces will get both interfacing and fusible fleece. Do the interfacing first, and then the fleece.
Step Six- Get your pleat on
So I mentioned briefly that you could work on the interior the bag while your dyed pieces were drying. That's what I did. The pattern directions are kind of none specific about the pleats. I did four pleats, each 1 1/4" deep moving from the center out (see pictures). You will pleat both the interior and exterior in the same manner.
 |
| So I marked my pleats on one of my interior pieces (this is only one side. I made a total of 4 marks on each). Then I lined up those marks with my other pieces for uniformity. |
 |
| The pleats all pinned in, looking from the wrong side. Notice anything incorrect here? Yeah, I forgot to fuse on the interfacing and fleece on my exterior fabric before I pleated. I removed the pins, fused, and redid it the way I told you to. |
Step Seven- Pockets full of Sunshine
Follow pattern directions for making the pockets. Again, because I prefer a sturdy interior, I interfaced all of the pocket pieces. Make yourself a sandwich (a fabric sandwich) and stitch around the outside using a 3/8" seam allowance and leaving a gap to turn the pocket right side out. Turn right side out, press, and top stitch according to pattern directions. Then pin and stitch the pockets according to pattern directions. (Yes, I'm feeling too lazy to give you every single detail on how to do this. Deal with it).
Step Eight- Interior Decorating
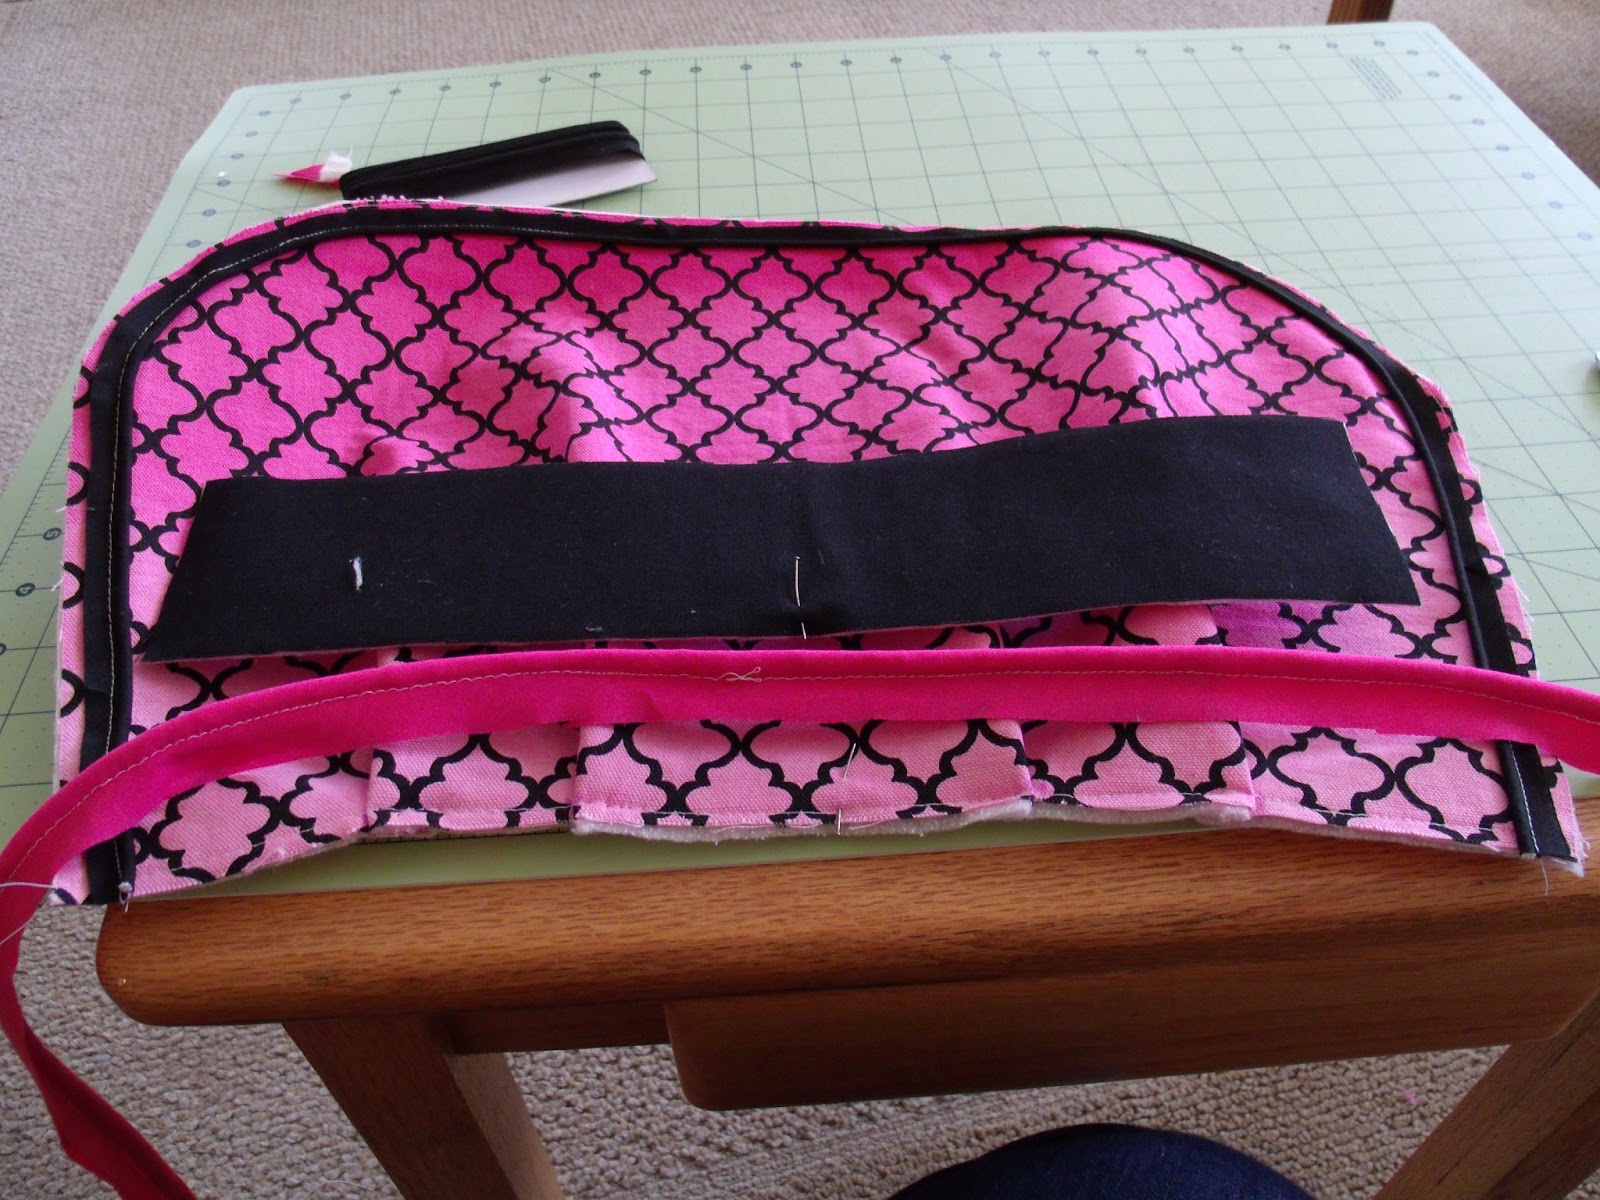
So here is another place where I deviated from the pattern: I used black cotton strapping and I attached them just below the yoke on the interior of the bag. I prefer this look but you may not. Whatever. I used my dress makers marker and placed the straps 4 inches from the outside edges of the bag. Make another (fabric) sandwich like so: bag interior right side up, straps (make sure they aren't twisted), and yoke wrong side up. Pin, stitch, and press seam open.Step Nine- Plumbing--er, piping
Grab your piping and get ready to make some magic. I used two different colors of piping: the black which I bought in a package, and the pink which I made using my gorgeous welting foot. Now, this pattern calls for 1/2" seam allowances and my premade piping had 1/4" seam allowances so I measured and placed very carefully before stitching it down. Then I stitched my pink piping to the yoke pieces. It should be noted that I used my welting foot while working on all the piping. The welting foot snuggles over the piping making sure you stitch closely beside it and not through the piping. If you don't have a welting foot, consider using your zipper foot which will more easily allow you to sew closely to the piping. When the piping is done, attach the yoke pieces to the bag exterior
 |
| Pin your piping to the perimeter of ONE of your exterior pieces. Stitch it down. |
 |
| Line up your top piping and cut to approximate length. My homemade piping had 1/2" seam allowances so that worked out well. |
 |
| I marked the centers on my bag exterior and yoke before beginning to pin. Pin everything and stitch it down. You can either stitch your piping down and THEN stitch on the yoke, or you can do it in one swell foop (as my music theory prof used to say...) |
 |
| Press it so it looks nice and pretty. Attach top piping and yoke to other side as well (dur). |
Step Ten- Double Bagging it
Using 1/2" seam allowances, stitch bag exterior, right sides together. Turn right side out and press. Using the same 1/2" seam allowance, stitch the bag interior right sides together. LEAVE A SIX INCH GAP AT THE BOTTOM TO BE ABLE TO TURN IT RIGHT SIDE OUT LATER. Press the seams on both bags.
Tip #1: Use painters tape to mark the seam allowance on the deck of your sewing machine rather than just winging it. Precision counts.
Tip #2: When sewing the exterior of the bag, I continued to use my welting foot to avoid stitching over the piping.
 |
| Pin right sides together and stitch. |
 |
| Another tip: I stitched over top of my piping stitch line so everything would line up and I wouldn't stitch over the piping. |
Step Eleven- Come together, right now, over me
Turn your exterior right side out and your lining inside out. Insert the exterior into the interior (I know, this sounds confusing but just trust me). Pin in place, making sure your seams are lined up (dur). Use a half inch seam allowance, and stitch around the top. Pull the bag exterior through the hole you left in the interior until the whole thing is right side out. Stitch up the hole by whatever means you prefer.
Note: In a lot of bags, I have top-stitched these holes closed and been dissatisfied later. So this time, I took the time to invisible stitch it closed by hand. It took ten minutes and I will always be grateful that I did it. This bag will last a lot longer than ten minutes.
 |
| Yes. Pin it like this. Like the original tutorial suggests, stitch with the thickest material (aka the exterior) on top. Turn right side out and you will start to see something that Looks like the picture... |
Step Twelve- Finishing touches
Push the lining into the bag and then press the yoke. Now it is time to top stitch. I did two rows of top stitching: 1 row 1/4" from the top of the yoke and 1 row 1/4" from the bottom of the yoke.
Step Thirteen (optional)- Weather insurance
I am a big fan of making things last and making sure that my expensive electronics don't get ruined if I trip and drop my purse in a puddle. This water proofing spray (purchased at walmart) is relatively cheap insurance. I spent $7 on the can which has also served to waterproof a few pairs of shoes and a table cloth. Take your bag outside and spray until the fabric looks wet. Then allow the bag to air dry for at least 24 hours before you take it out on the town. The coating does not change the color of the fabric and it is odorless BUT ONLY AFTER IT IS 100% CURED.
...I made the mistake on the drying time thing and it stunk up my car pretty good. I was worried that this was permanent but then the next day the smell was 100% gone.
 |
| This is the stuff I used. It has a neon orange cap and I found it in the camping section at Walmart. |
Step Fourteen- What we wanted all along...
Stuff your bag full of your stuff and enjoy it, lady! You worked hard!
If you have any comments or questions, please drop me a line. :) I'd love to hear what you all think.


 |
| hanging from a tree outside as the waterproofing dries... |
 |
| and stuffed full of crap, ready to go! |
 |
| Admire that gorgeous ombre! |
If you have any comments or questions, please drop me a line. :) I'd love to hear what you all think.
P.S. If you absolutely love my bag and don't feel like making your own, I will have a duplicate up on Etsy in the next few days. :)

This looks adorable!! I would love for you to share at my Tasty Thursdays linky party and GIVEAWAY. Going on until Sunday. Hope to see you there and spread the word!! Thanks, Nichi - The Mandatory Mooch
ReplyDeletehttp://www.mandatorymooch.blogspot.com/2013/04/tasty-thursdays-36-giveaway.html